
There’s nothing quite like the taste and texture of a homemade pie crust made entirely with butter.
This Pie Crust Made with Butter Recipes gives you a flaky, buttery, and golden crust every time—perfect for both sweet and savory pies.
It’s simple to make, rich in flavor, and works beautifully for any filling, from fruit pies to quiches.
Why You’ll Love This Recipe
This pie crust is made with 100% butter, which means maximum flavor and flakiness.
The dough is tender yet crisp, with delicate layers that practically melt in your mouth.
It’s easy to make in a food processor and comes together in minutes with just a few basic ingredients.
You can chill it ahead of time, roll it out when needed, and use it for everything from holiday pies to everyday baking.
What You’ll Need (Ingredient Highlights)
Unsalted butter is the heart of this recipe—it creates that rich, buttery taste and flaky texture.
All-purpose flour provides structure and gives the crust its tender bite.
Salt enhances the flavor and balances the richness of the butter.
Ice water binds the dough together while keeping it cold, which is essential for perfect flakiness.
Each ingredient plays a simple but important role in creating a crust that’s flavorful and foolproof.
Pro Tips Before You Start
Always keep your butter and water as cold as possible—this prevents melting and helps create flaky layers.
Pulse the dough in short bursts to avoid overworking it.
Stop adding water as soon as the dough starts clumping together; too much will make it tough.
Handle the dough quickly and gently—warm hands can soften the butter.
Let the dough rest before rolling to relax the gluten and make it easier to shape.
Chill again after shaping for clean, defined edges when baking.
How to Make Pie Crust Made with Butter Recipes
Step 1 – Combine the dry ingredients
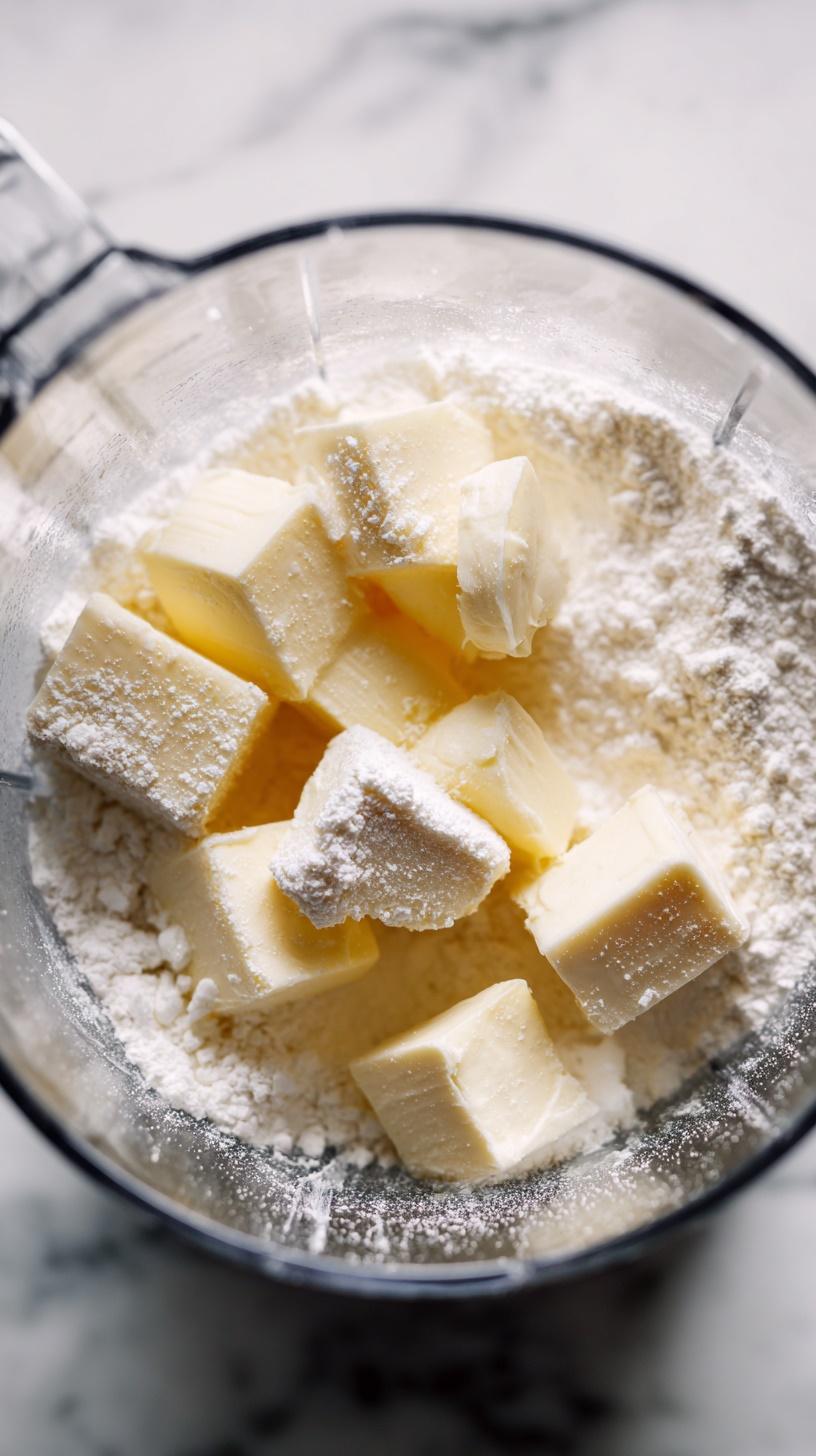
Toss the flour and salt into your food processor. Add the super-cold, cubed butter.
Step 2 – Pulse the butter and flour
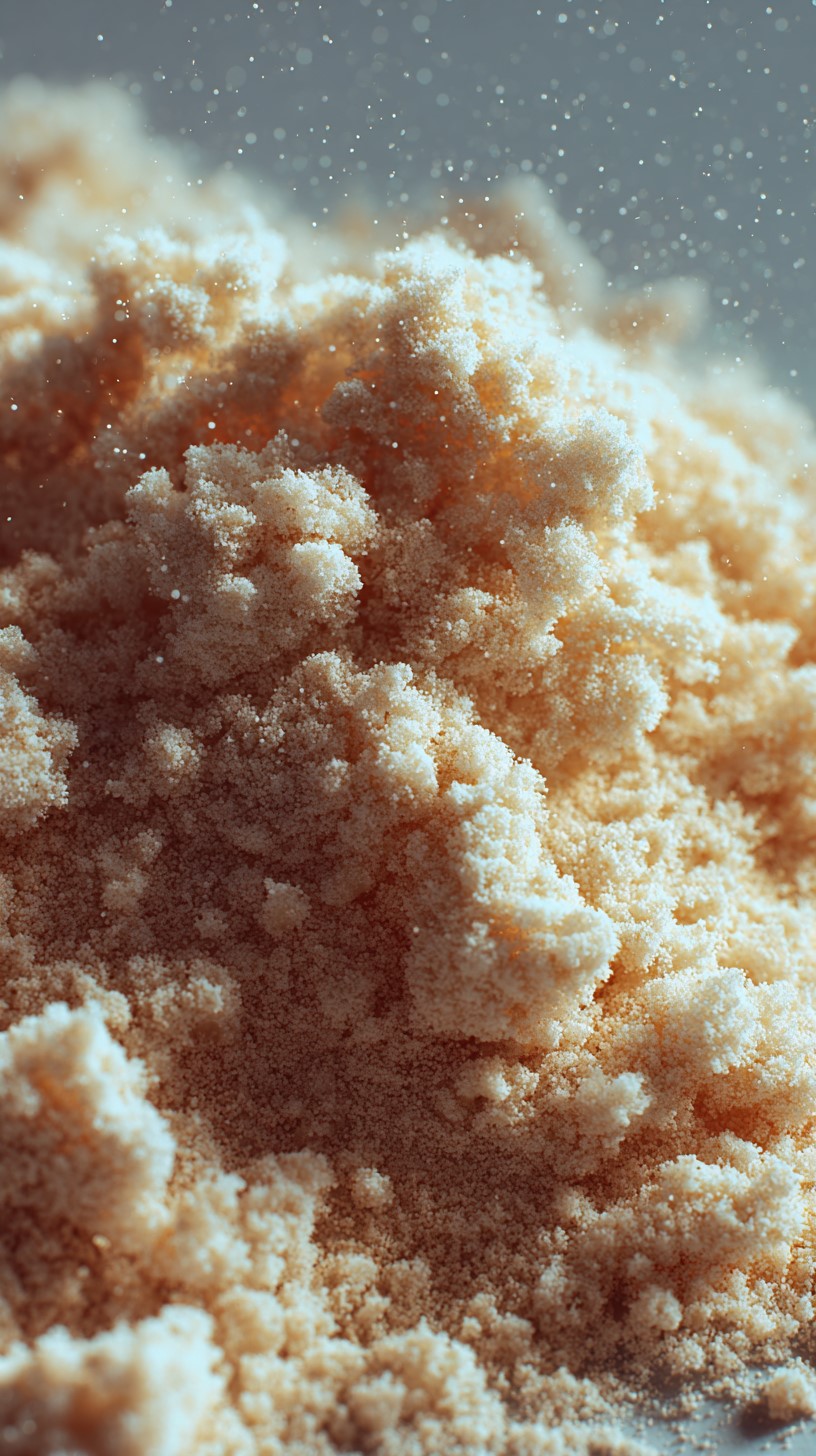
Pulse 15 to 20 times until the mixture looks like coarse sand with small butter bits.
You want visible pieces of butter about the size of peas.
Step 3 – Add the ice water
Pour the ice water into the processor one tablespoon at a time, pulsing 4 or 5 times after each addition.
Stop once the dough begins to clump and pull away from the sides.
Step 4 – Form the dough
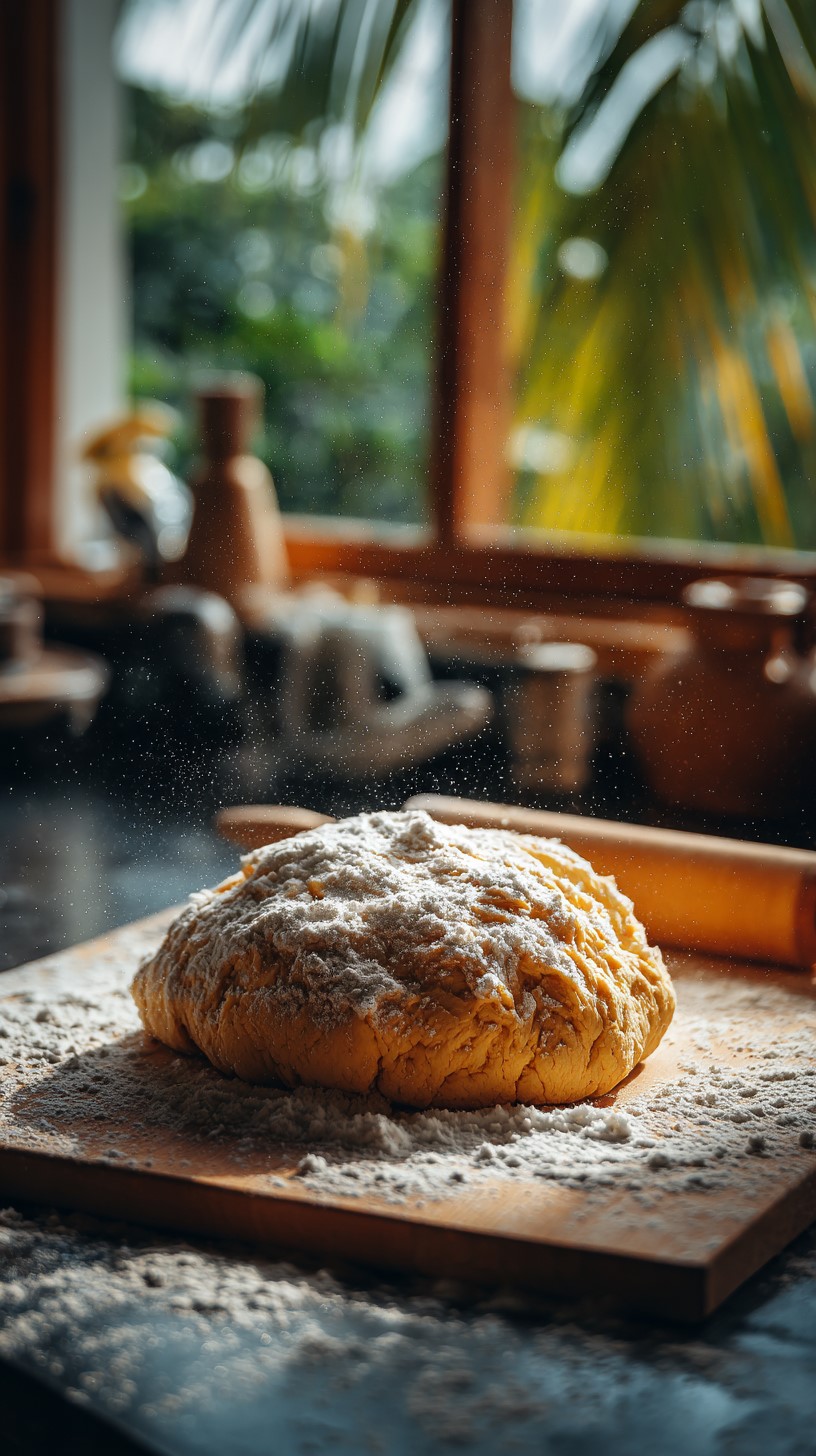
Dump the mixture onto a lightly floured surface.
Gently push it together with your hands until it forms a cohesive dough.
Step 5 – Divide and shape
Split the dough into two equal portions.
Shape each one into a ball, then flatten each into a 4-inch disc.
Step 6 – Chill the dough
Place each disc in a zip-top bag and refrigerate for at least one hour.
The dough can rest for up to four days if you’re making it ahead.
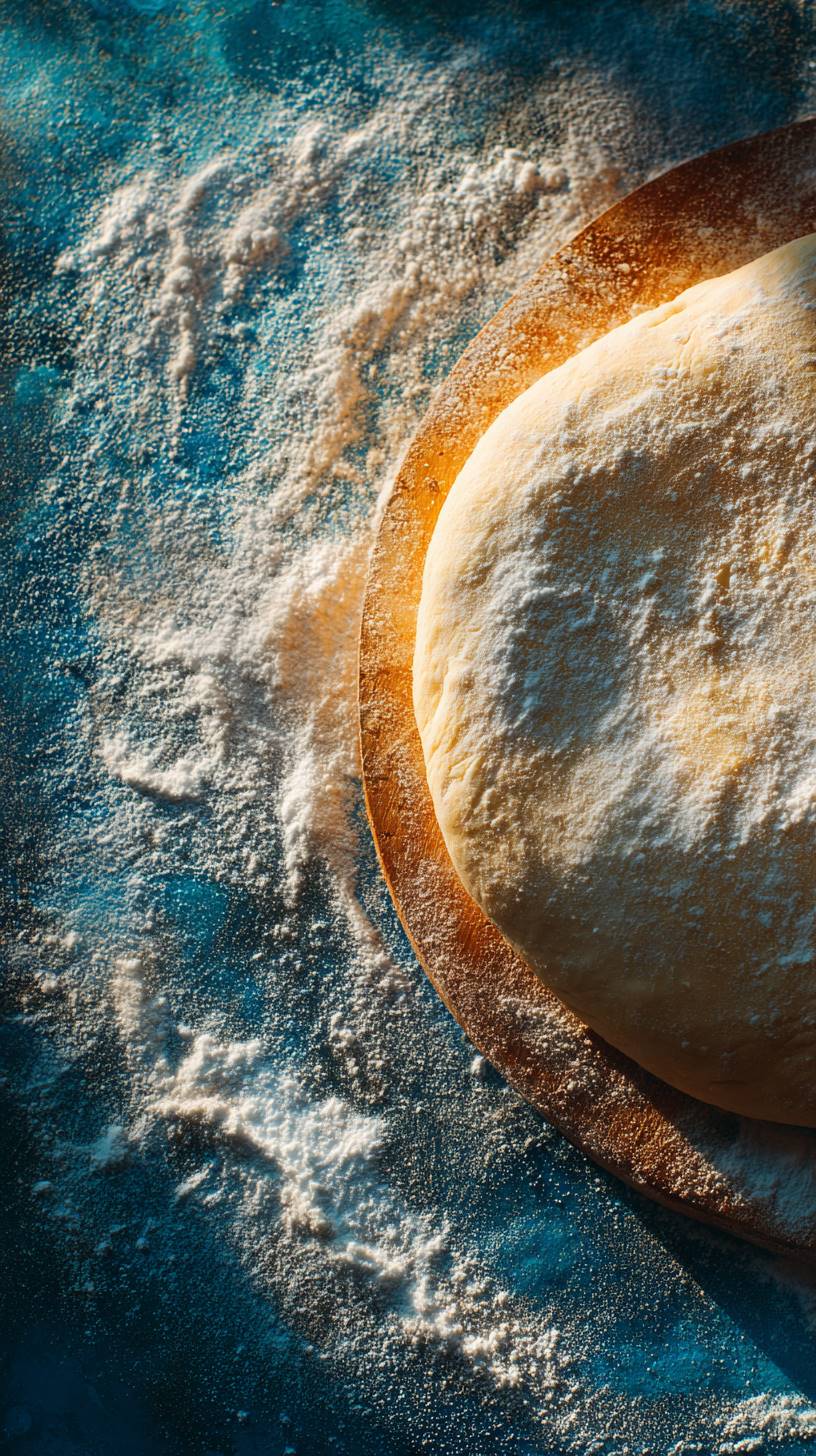
Step 7 – Roll it out

Remove the dough from the fridge about 3 to 4 minutes before rolling.
Lightly flour your counter and rolling pin.
Roll from the center outward, turning the dough a quarter turn after each roll.
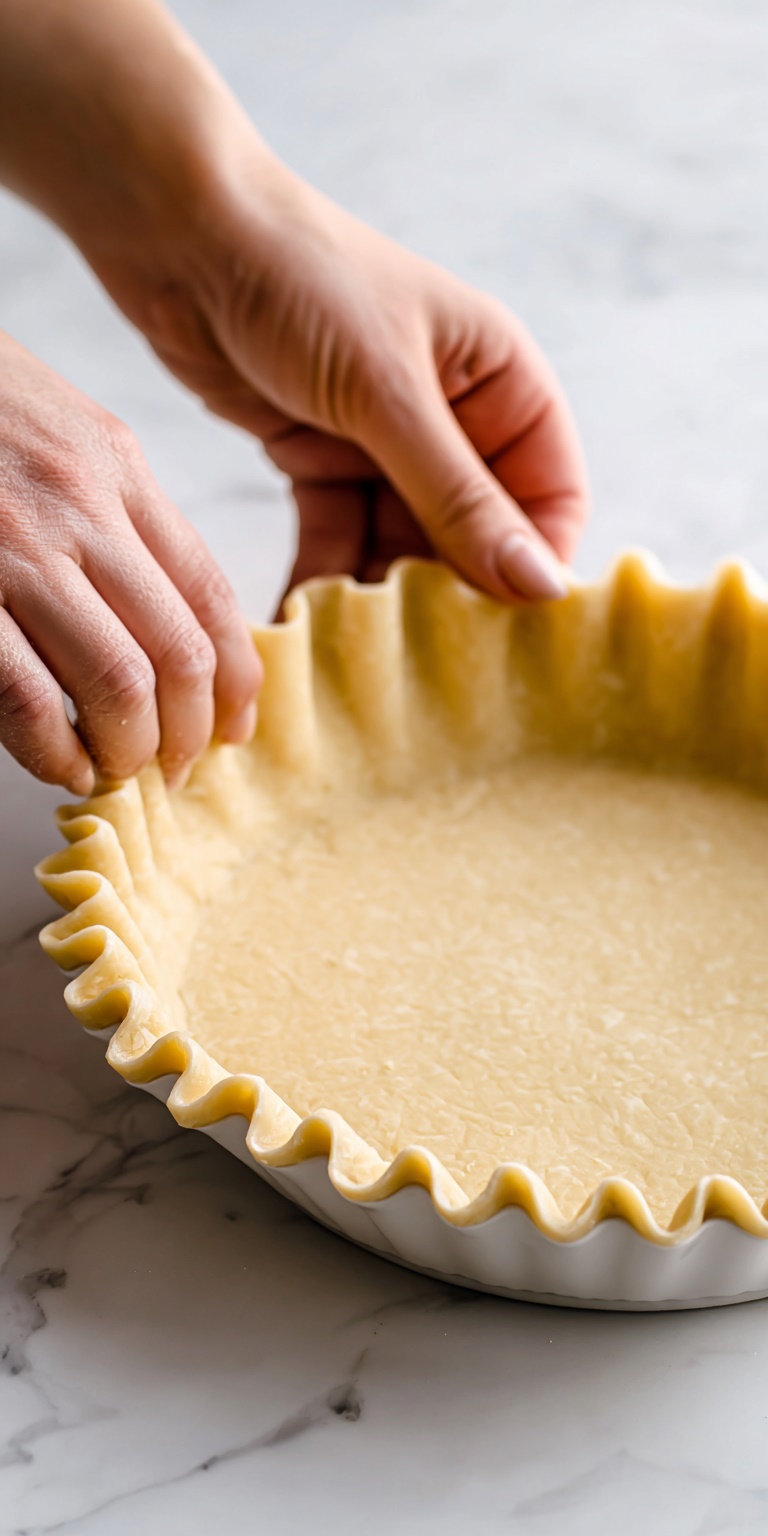
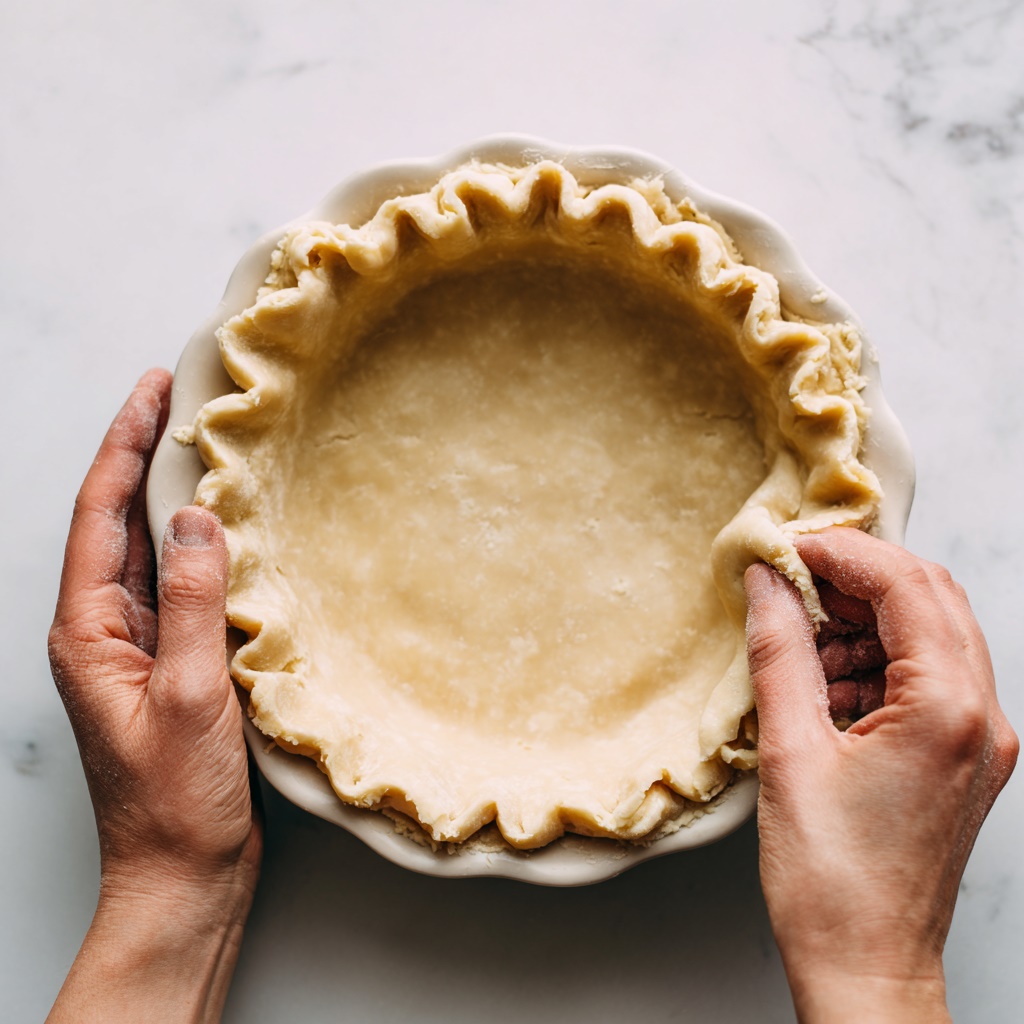
Step 8 – Shape and fix
Continue rolling until the dough is about 4 inches larger than your pie plate.
If it cracks, just pinch it back together—completely normal.
Step 9 – Rest before baking
Let the rolled dough rest for about 5 minutes before transferring it to the pie dish.
This helps prevent shrinking.
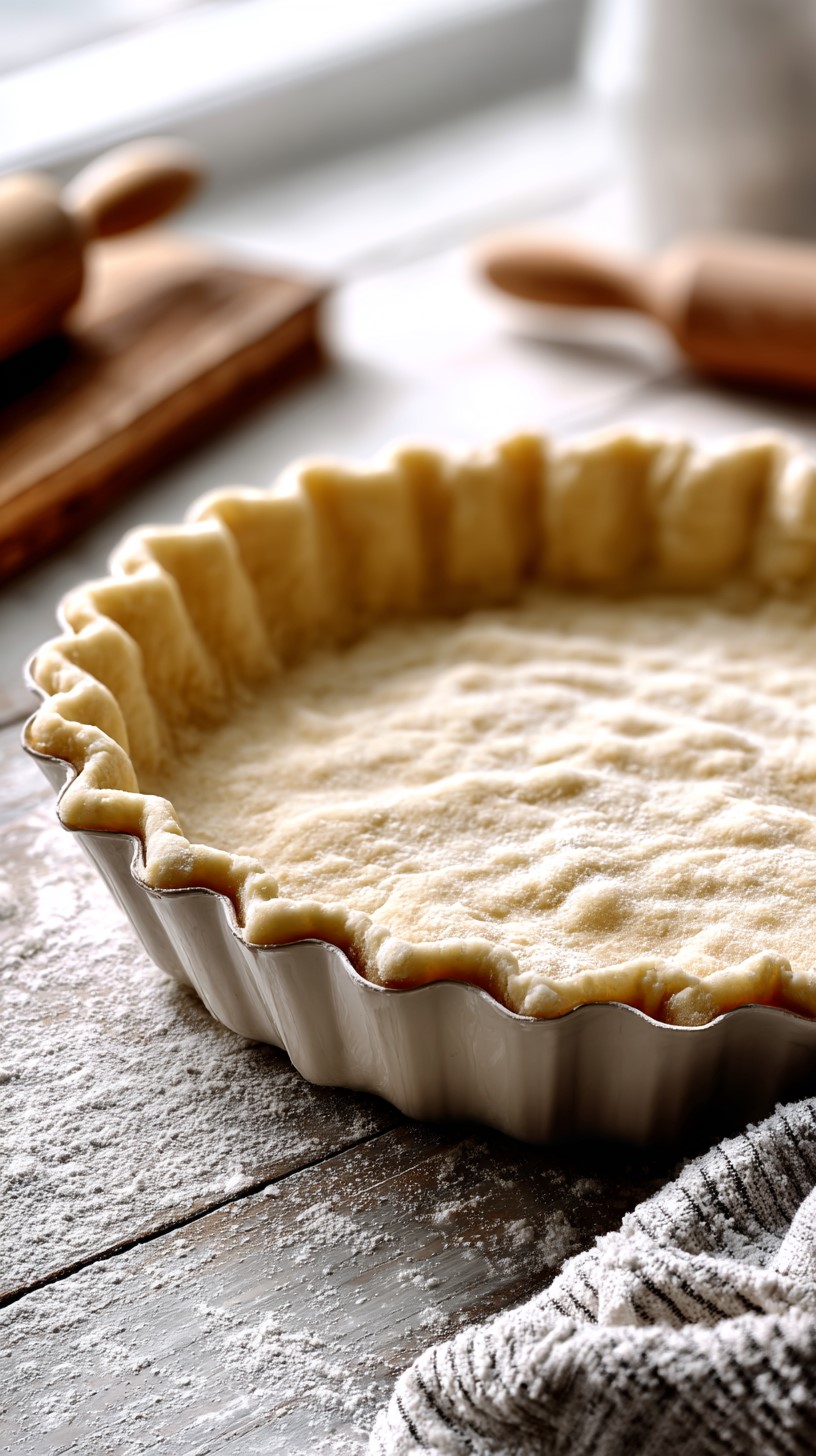
Step 10 – Fill and bake
Transfer the dough into your pie pan, crimp the edges, and fill with your favorite pie filling—fruit, custard, or savory.
Bake according to your recipe.
What to Serve It With
This crust is perfect for any type of pie filling—apple, pumpkin, pecan, or cherry.
It also works beautifully for savory dishes like quiche, pot pie, or tomato tart.
Pair it with a scoop of vanilla ice cream for dessert or a fresh side salad for savory pies.
Its rich, buttery flavor complements both sweet and salty creations effortlessly.
Variations / Substitutions
Use half butter and half shortening if you prefer a slightly flakier texture.
Add a teaspoon of sugar for a subtly sweet crust, ideal for desserts.
Use salted butter and reduce the added salt slightly.
Substitute whole wheat flour for part of the all-purpose flour for a nuttier taste.
Add a tablespoon of vinegar or vodka to the ice water to help keep the crust tender.
For a decorative touch, sprinkle coarse sugar on top before baking.
Storage & Leftovers
Wrap unbaked dough tightly in plastic wrap and refrigerate for up to 4 days.
To freeze, place the wrapped dough in a freezer-safe bag and store for up to 3 months.
Thaw frozen dough overnight in the refrigerator before rolling.
Once baked, store leftover pie at room temperature for one day or in the refrigerator for up to four days.
Reheat gently in the oven to maintain crispness.
FAQs
Can I make this dough without a food processor?
Yes, use a pastry cutter or your fingers to cut the butter into the flour.
Why does my crust turn tough?
It may have been overmixed or had too much water—handle the dough gently.
Can I use salted butter?
Yes, just reduce the added salt slightly.
Can I freeze the dough?
Absolutely—wrap it tightly and freeze for up to three months.
How do I keep the dough from shrinking?
Let it rest before baking and avoid stretching it when fitting it into the pan.
What if I don’t have ice water?
Add a few ice cubes to cold water—it must be very cold to keep the butter firm.
Can I make this crust gluten-free?
Yes, use a 1:1 gluten-free flour blend and handle gently.
How do I make the crust flakier?
Use cold ingredients, visible butter chunks, and minimal handling.
Can I make the dough in advance?
Yes, refrigerate for up to four days or freeze for longer.
Should I blind bake this crust?
Yes, if you’re using a no-bake filling—line with parchment and fill with weights before baking.
Final Thoughts
This Pie Crust Made with Butter Recipes delivers the ultimate homemade crust—flaky, flavorful, and melt-in-your-mouth tender.
It’s versatile enough for every pie, whether sweet or savory, and easy enough for beginners to master.
Once you make your own butter crust from scratch, you’ll never go back to store-bought again.
Pie Crust Made with Butter Recipes
Ingredients
Method
- Add butter, flour, and salt to a food processor.
- Pulse 15–20 times until coarse crumbs form.
- Add ice water, one tablespoon at a time, pulsing between additions until dough begins to clump together.
- Turn onto a counter, gently form into a ball, then divide into two.
- Flatten into discs and chill for at least 1 hour.
- Roll each disc on a floured surface until 4 inches larger than your pie plate.
- See full steps with tips & photos → https://ekellyn.com/pie-crust-made-with-butter-recipes/
Notes
- Use cold butter and ice-cold water for the flakiest crust.
- If the dough cracks, just pinch it back together — it’ll bake beautifully.
- Resting the dough before baking prevents shrinking in the oven.